It’s amazing how some things bring you back to your childhood. I have been playing around with CREATIVE PAPERCLAY and memories flood back of my childhood playing with play dough or watching my kiddies making cookies with play dough and cookie cutters which brings me back to what I have been doing.
Early last month Scrapbook Paradise hosted a cake decorating class and I went along to cover the shop floor while Elena was creating with the cake ladies. I must admit that I was takin by it all and was wondering how I could incorporate it into paper crafting. It hit me about an hour later! PAPERCLAY!!! I could do everything they had been doing with paper clay… EXCITING, so with my hands full of cake decorating goodies I came home and played, oh the fun I had. My fav would have to be making my own leaves to go on my projects.
Here’s how I did it!
To make these leaves you will need non stick craft mat, or baking paper, craft rolling pin, or your child’s rolling pin from their play dough set, CREATIVE PAPERCLAY, and leaf cutters or a knife to cut shapes. (just a note if you are going to use a knife, please use baking paper instead of your non stick craft mat!) 
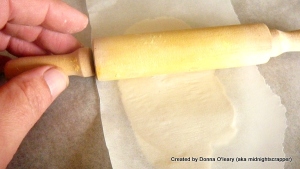
Roll Paperclay out on your craft mat. I have also used baking paper under my rolling-pin as my pin was getting a bit sticky. Roll out thinly, approx 1ml. The thickness really depends on the project you are doing. I wanted these to be thin.
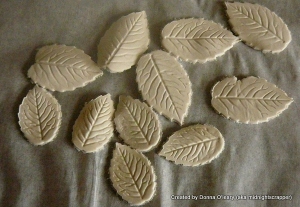
Once rolled, press your leaf cutter into your Paperclay and make as many as you like. A little Paperclay does a long way. My leaf cutters have an embossed flat surface so I was able to get veins on my leaves. If you would like veins you could use a fine nib stylist.
After you have cut your leafs out start shaping them to the desired dimension. I have used an old knitting needle to achieve this.

 Paperclay is an air dry product. Leave them in a warm space and let dry. Drying time depends on the thickness of your project, normally 1 – 3 days. If you are inpatient like me you could place them on a bit of scrap card and pop on top of your OIL HEATER, and it takes approx 30 mins again depending on the thickness. Once your project is dry you can colour with paint or ink.
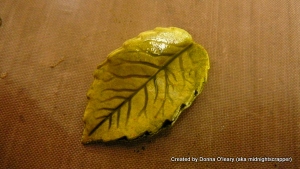
To colour my leaves I have chosen to use Distress Ink Refillers, these are highly concentrated and you only need a little.
I use a craft mat to mix my inks. you can use full strength or water it down with water. You can paint with re-inkers like water paint. Fun 🙂
Let this dry and then use your distress ink pads to shade your leaves, you can also spray with water to blend.

If you have added more water you need to let it dry, you could use a heat gun to dry if the clay has not become wet. To seal my leaves I have used MicroGlaze, it is the only product that you can use with distress inks as it is not water based.
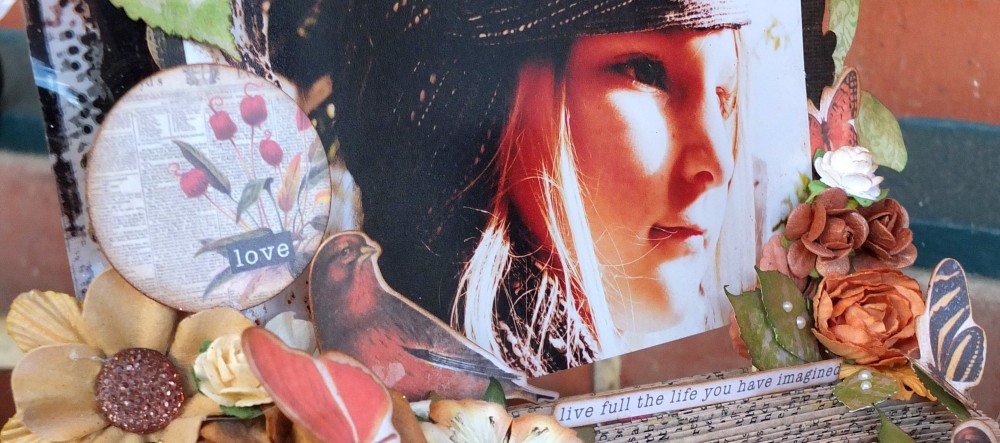
Rub the MicroGlaze into your leaves with your finger and your finished. All you have to do now is add them to your projects. I love making a batch up at a time and have them ready to go! I hope you have enjoyed this tutorial and if you have any questions please feel free to leave it in the comments. Happy Scrappin everyone xox Donna


Nice demo!
Your leaves look fantastic and what a great tutorial!
hugs,
Gini
Genus!
You Pinned me 🙂 thank you
My goodness! These leaves are gorgeous!
Oh I love that stuff!! I’m going to have to do this too! Love your demo!
great technique. thanks for your submission to be apart of the creative paperclay design team..
Holy Cow Donna!These are just gorgeous! They look so real! Thanks for sharing this awesome tutorial!!!
awesome! those leaves would put Prima out of business! they are so good. Great tutorial… I may never look at the cake making department in spotlight the same again!
Cool – the leaves look so real!
Melanie here! I absolutely loved this piece, please email me–I have a question about your blog 🙂 MelanieLBowen[at]gmail[dot]com
I have emailed you, look forward to hearing back 🙂
These look amazing Donna!
These leaves are so beautiful, Donna. I bought some paperclay but wasn’t sure what I wanted to do with it. Thanks so much for the gorgeous inspiration!